
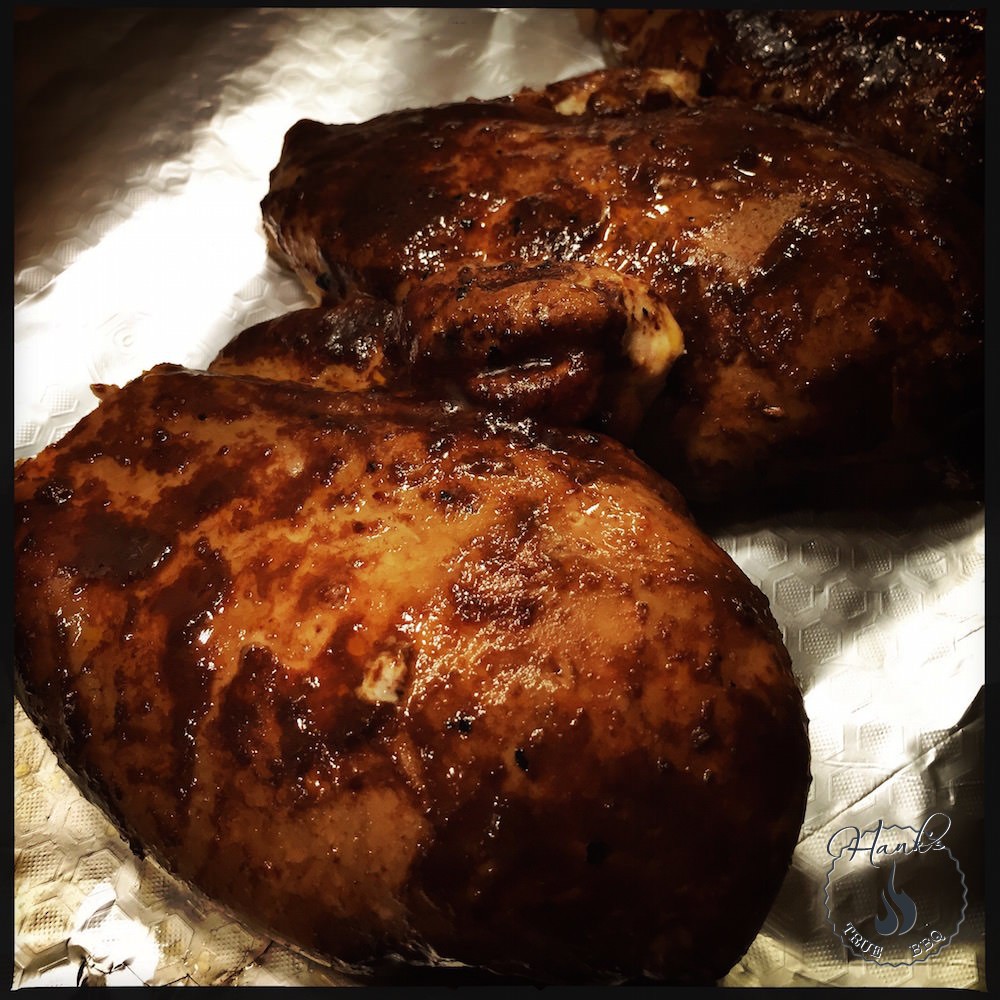
Here’s grilled chicken in with a twist; we cover it with a chocolate and chili glaze, and inject it with lemon syrup, for a slightly different flavor. The chocolate should be dark, with lot’s of cacao. I use one with 70%. I chose the ancho chili for its smokey flavor, with hints of tobacco. It is a good match for the chocolate.
Servings 4
Ingredients
- 4 chicken breasts
Glaze
- 2 tbsp vegetable oil
- 1 tsp ground cumin
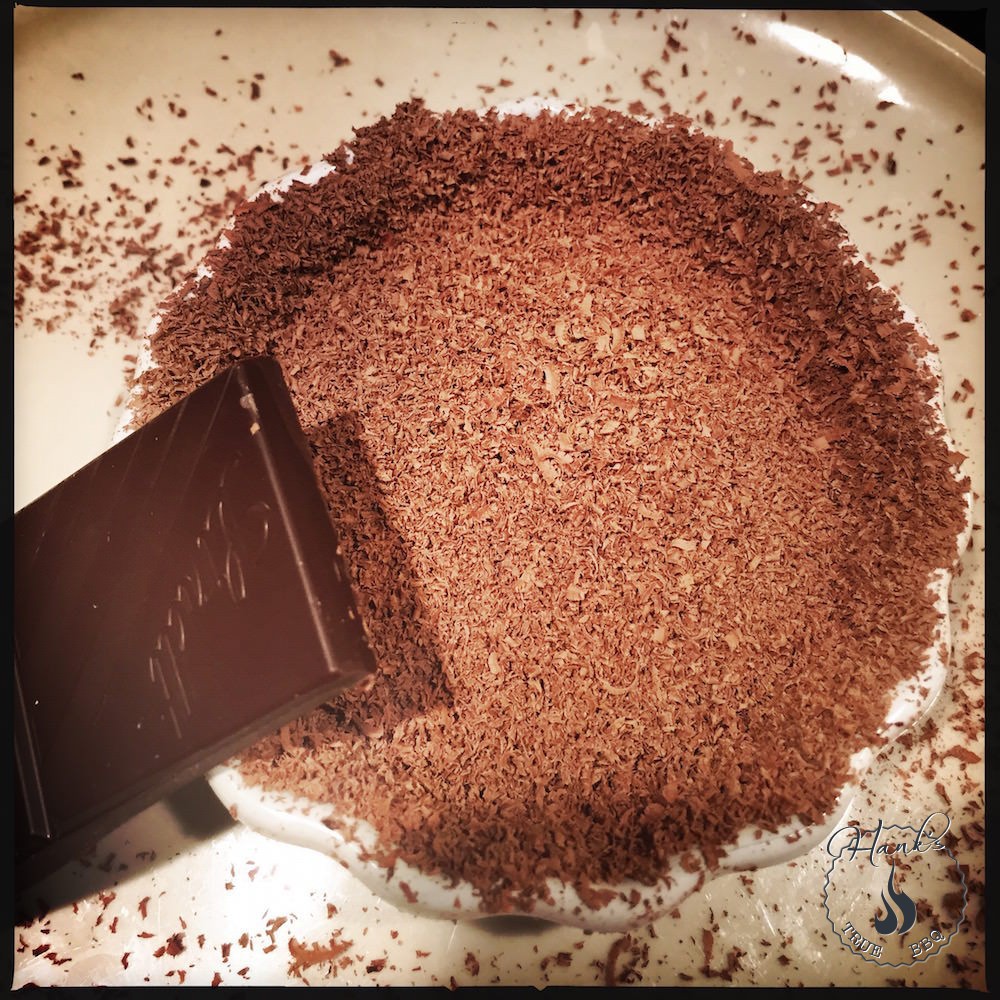
- 4 tbsp dark 70% chocolate (roughly 30 grams/1 oz)
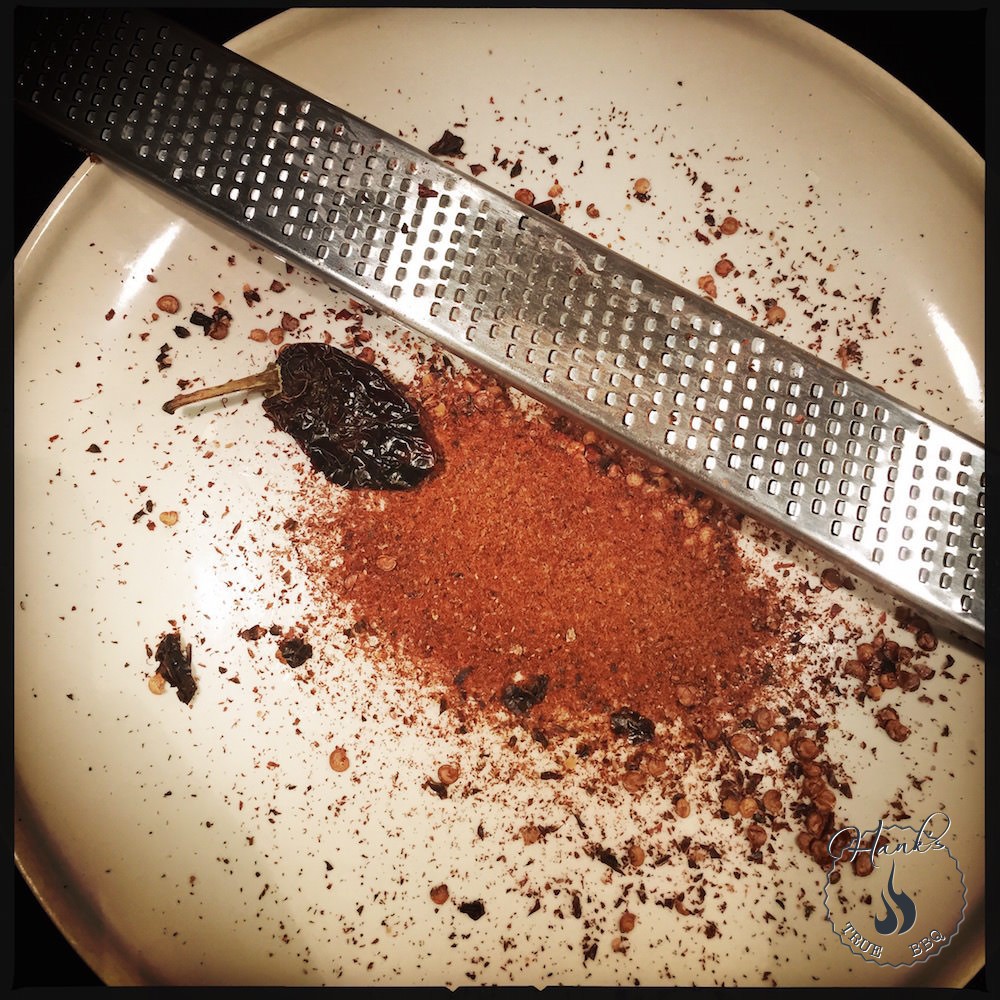
- 1 tsp ground ancho chili
- 0.5 tsp salt
Injection
- 1 tbsp sugar
- 1 tbsp lemon juice (freshly squeezed)
- 1 tbsp hot water
Instructions
- Start by making the injection. Mix the hot water with the sugar, and stir until it dissolves. Then add the lemon juice, and stir a little more.
- Now it’s time for the chocolate and chili glaze. Use a microplanar (or other fine grating tool) to grind the chocolate.
- When it is done, grind the chili the same way, but keep them separate.
- Now mix the glaze in a small bowl, by adding the ingredients one by one.
- Fill a marinade injector with the injection fluid, and inject the chicken breasts, roughly 4-5 times per breast. You won’t be able to insert a lot of fluid, but every little helps. It adds flavor, and keeps them moist.
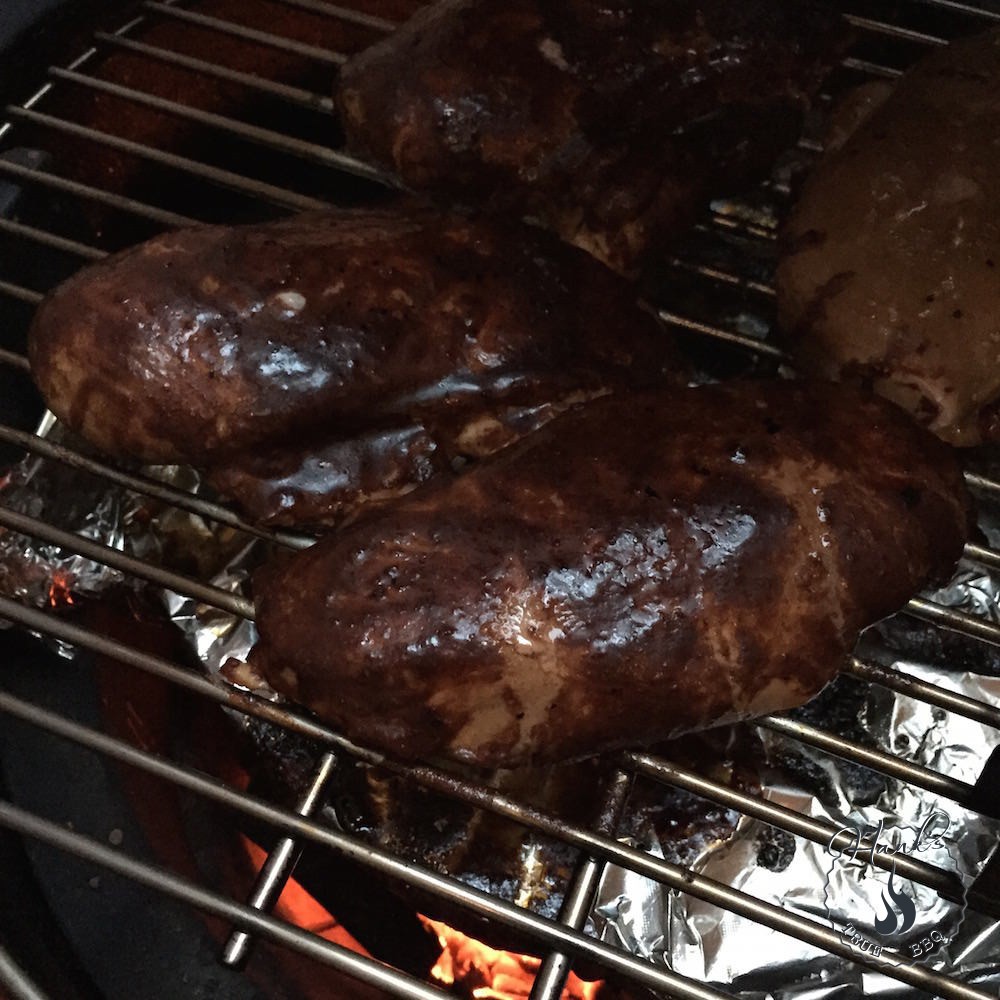
- When the food is prepared, fire up your grill, have it running on indirect heat at around 140° C / 280° F. I added a few chunks of apple wood to the fire for a little smoke flavor. Apple wood has become my goto wood for smoking chicken.
- When the chicken breasts have been on the grate for 20-25 minutes it is time to apply the glaze. Lay it on thick, and close the lid.
- Continue cooking until the chicken breasts have an internal temperature of 70° C /158° F. Remove, wrap in aluminum foil and a towel, and let them rest for 20 minutes before serving.