
Are you curious about the different ways of grilling in South America? Here’s a walkthrough of what a Parrilla is and how to use it.
Overview
There are many ways of cooking food over live fire. One of several commmon ways of grilling in South America is by using a so called Parrilla. It’s a kind of fireplace where you burn wood into charcoal which is then shuffled to the side to use for cooking food. A parrilla can be very simple, like grill grates placed on two rocks on the ground with charcoal underneath, or large commercially built grills with a crankshaft to raise and lower the grill grates over the fire.
Cooking food in this way is referred to as cooking ‘a la parrilla’, you can also cook your food ‘al asador’. The latter refers to the ‘asadores’, the metal crosses upon which the carcass is splayed open and then placed over glowing embers. This article focuses on cooking ‘a la parrilla’.
Construction
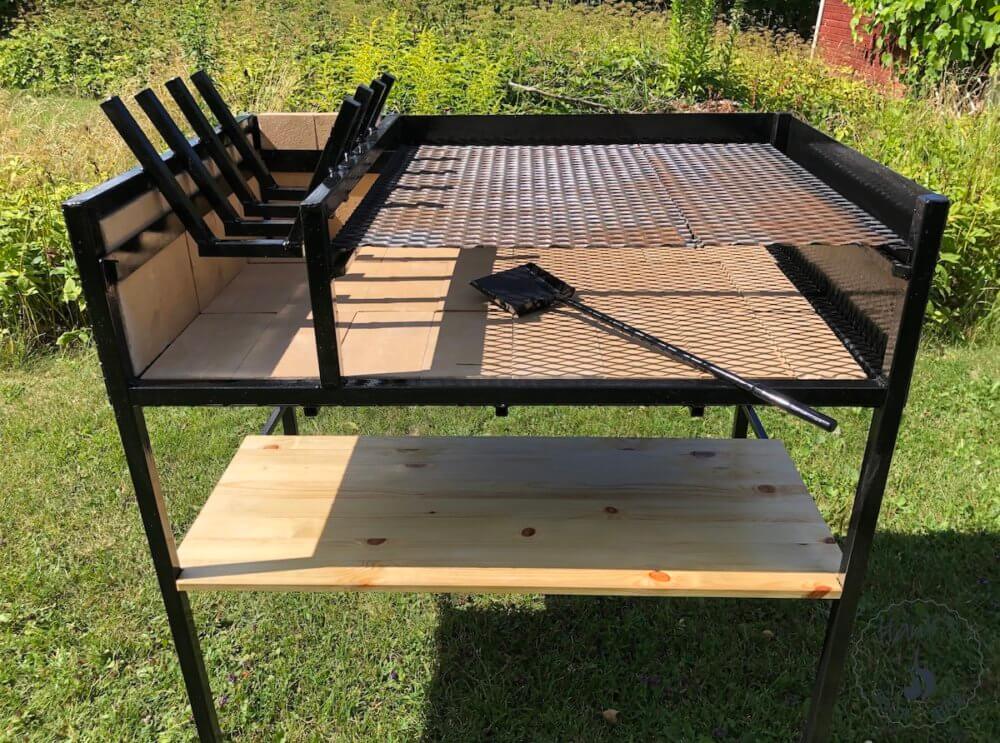
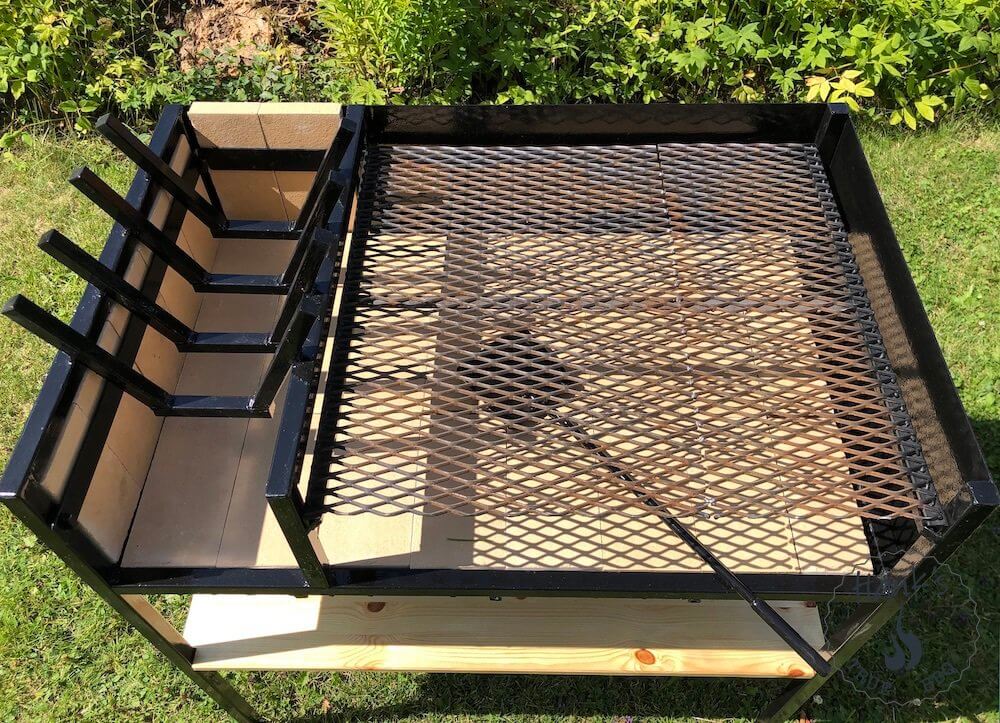
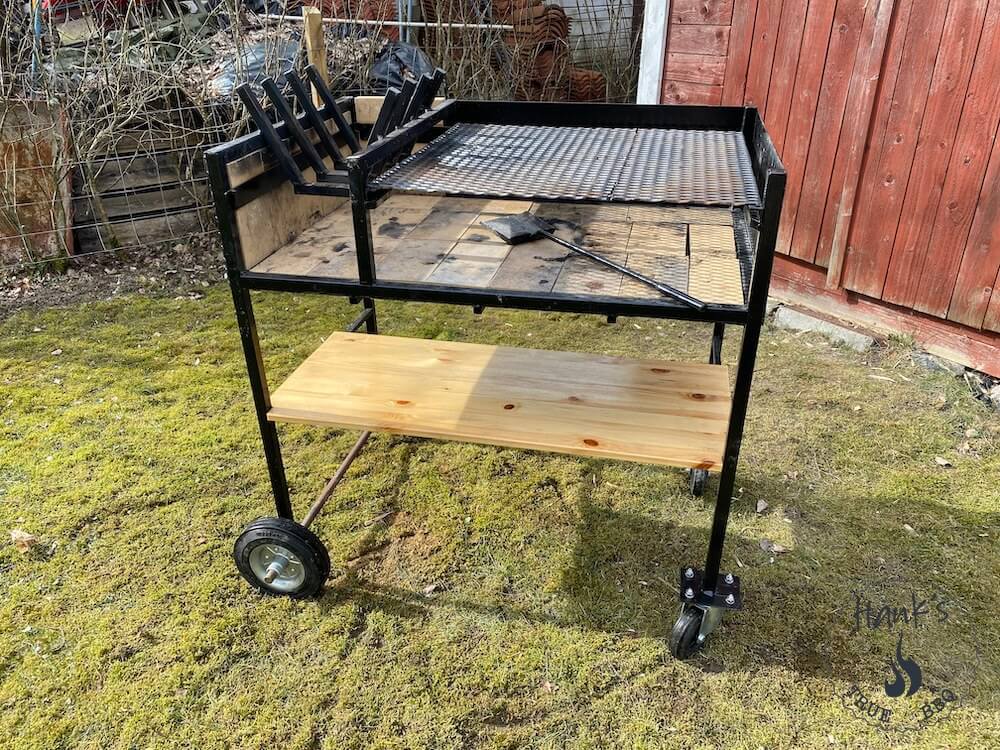
A common way of constructing a parrilla is by building it kind of like a table where there’s a cradle of sorts on one side where you place the logs/splits. When the logs progressively turn into charcoal the charcoal is shuffled over to the other side, underneath the grill grates, where the food is cooked. So the fire wood has to turn into glowing embers first.
Dimensions
I made this Parrilla 1 meter tall (40″), 97 cm wide (39″), 63 cm deep (25″). The grill grates measure 60 x 65 cm (23.5″ x 25.5″).
The fireplace (‘brasero’)
If you want to build your own there are few things worth noting. It’s gonna get very hot where the fire is, so oversized material is recommended. The log ‘cradle’ I constructed is made of 20 mm (25/32″) solid square bar, so it will last a long time. Round or square tube won’t last, the fire will burn through. A good distance between the bars is 5-8 cm (2-3″), no more. This provides adequate room for the glowing embers to fall through.

The fireplace is surrounded by bricks (‘fogonero’) which not only blocks heat radiation, but also (when cooking outside) provides wind protection.
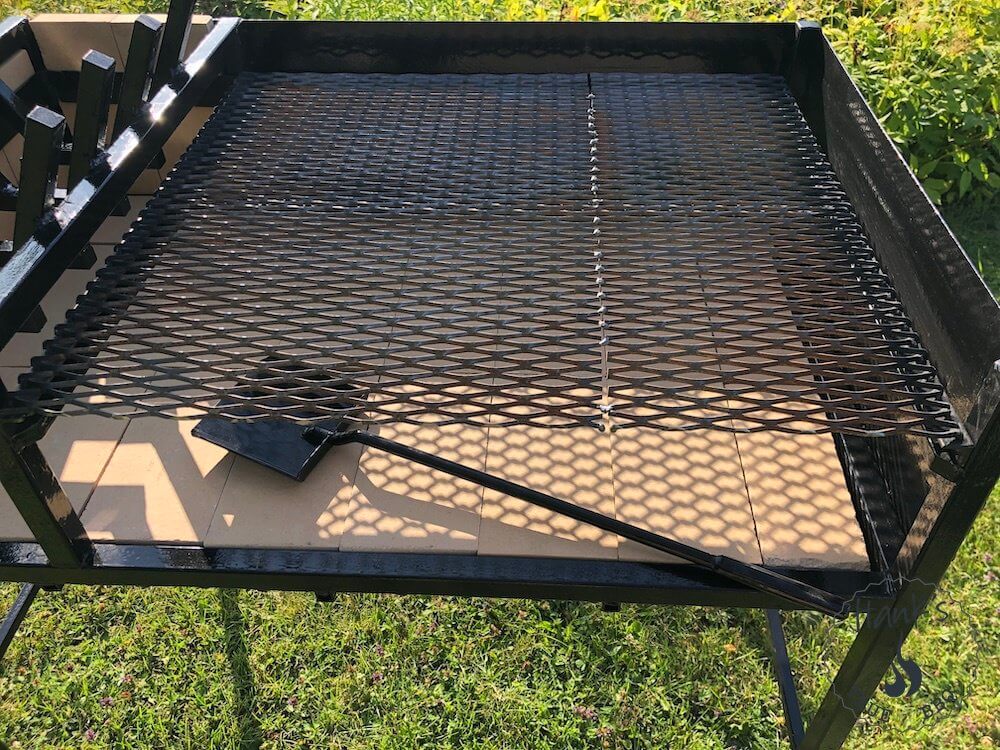
The cooking side/grill grates
This part is less complicated. I fabricated grill grates by using ordinary expanded metal, but any other choice will do. using stainless round bars (lots of them in parallel) works great, and is easier to clean. So, what about coal bed to grill grates distance? Well, 15-18 cm (6-7″) is recommended, no more. This provides a good height where you can increase heat (if needed) by shuffling more coals underneath.
YouTube Video: custom building a Parrilla
Usage
Fire Wood
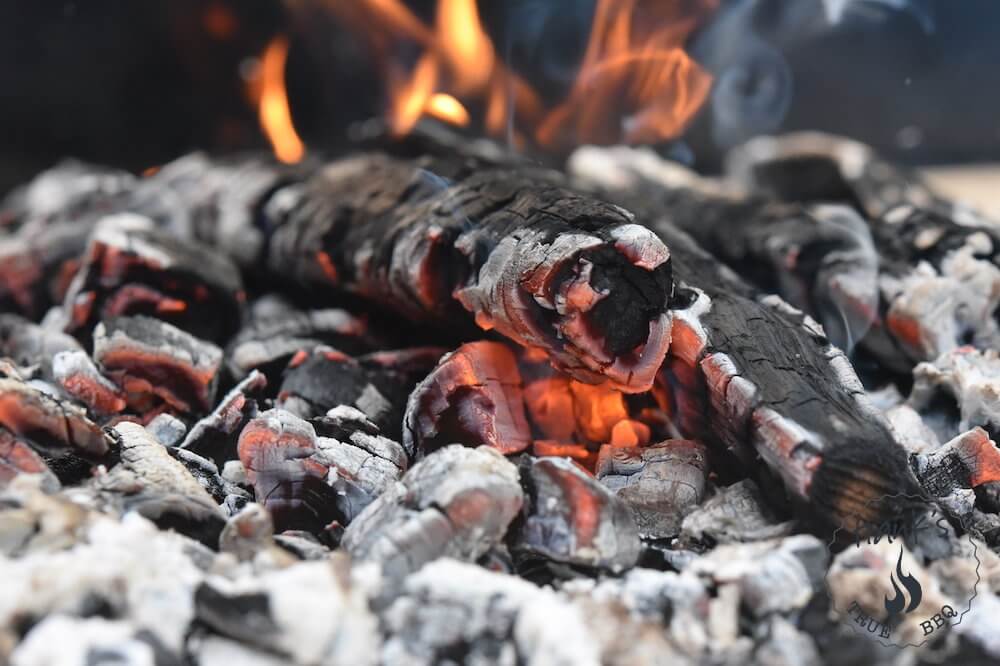
You use the hardwoods that are available locally. Just like for traditional barbecue you steer clear of the trees with high sap content, like pine or larch. But a lot of other types of wood are good to use. Oak is very common in American barbecue, but here it is less well suited since it goes directly from burning log to ash. There’s no glowing ember middle stage. Mesquite is good, I use birch since that is what I have available. Normally I would never use birch in my offset smoker, I really dislike it’s smoke flavor, but this type of cooking is different. We don’t smoke meat, we grill it, and for that birch is a good option.
Starting the fire
Start by placing a few splits in the firebox. I prefer splits to get the fire started. Place a few fire starter cubes (or similar) underneath, directly on the fire bricks, and add some kindling. When the splits catch fire, keep adding a few more and then add logs. Make sure you get a real good fire going, we want the wood to burn so it produces charcoal.
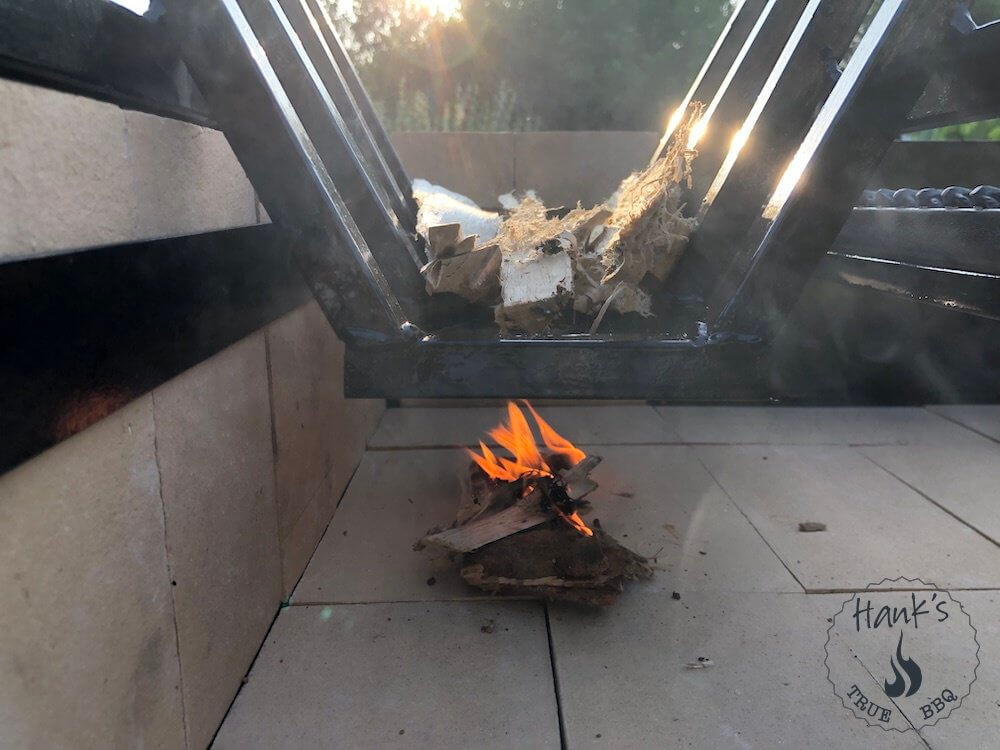

As charcoal and glowing embers fall down on the bricks, keep shovelling them over to where the food is.
Use a long shovel, I fabricated one like this:
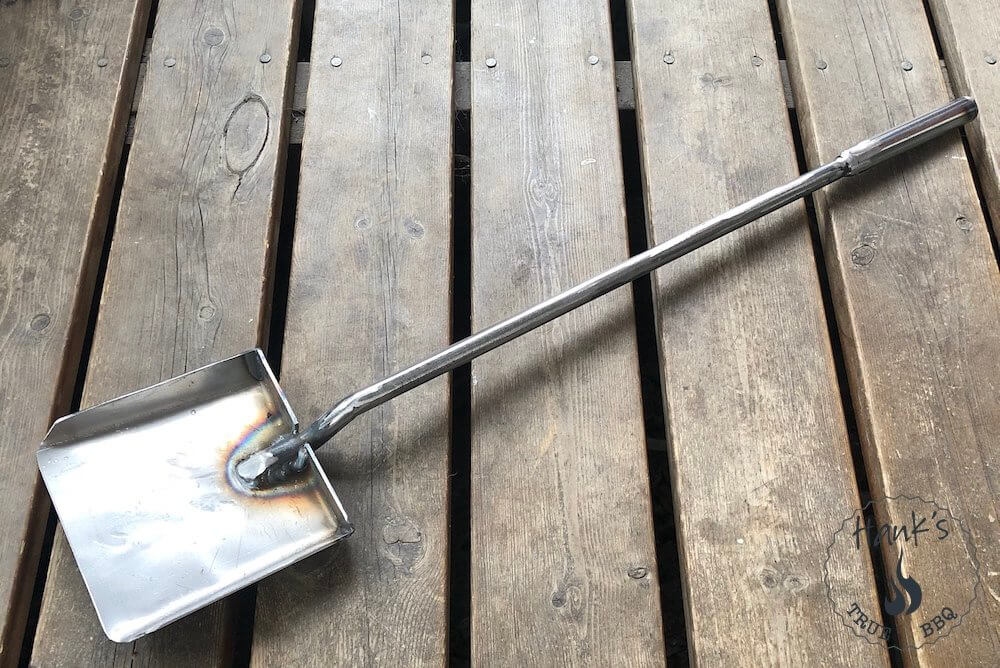
The last thing I did was to mount wheels on it, so much easier to move it around. That was a smart thing, if I may say so myself 🙂
YouTube video: how to grill a Tri tip on a Parrilla
YouTube video: how to grill a Tomahawk on a Parrilla
Hey Henrik, great video! Can you tell me the basic dimensions like overall height, width, length and also the dimensions of the grilling grate itself? How did you go about cutting the fire brick for the left side? I have a local shop here in town that I’m looking at getting an estimate to build one of these for me. I’d like to give them my business since they are local and also think the cost may be more reasonable than purchasing from a retailer.
I appreciate all the help!
Fritz (Hulagn1971 on Amazingribs)
Hey Fritz! I just added the dimensions to the page (under the ‘Construction’ heading), I hope that helps. I bought a diamond cutting blade for my steel grinder. You have to use a special cutting disc for cutting through the fireproof bricks. It is extremely dusty, so if you’re gonna do it, do it outside 🙂 But with the right tools it wasn’t too hard. Fireproof bricks come in different dimensions, I checked size before constructing my parrilla, so I could get an even number of bricks in there (roughly).
Cheers, Henrik
Hi Henrik
A fantastic video! This has motivated me to build my own…should be an adventure having not welded before.
Can I ask what thickness of sheet metal you went for and if it is holding up ok?
Thanks Doug! I use 2 mm sheet metal, it’s holding up just fine. But I reinforced the bottom with a few bars, and also those fire proof bricks block a lot of heat, so I would do the same if I had to rebuild it today.
Cheers, Henrik
Hi Hank, nice design! I wondered if you really need to use fire bricks given the relatively low temperatures involved. Ordinary clay housebricks – especially old, hand-made ones – are readily available for free and much easier to work with in these straightened times. What don you think?
Thanks! I use fire proof bricks because then I know they will last forever. But ordinary bricks work fine too. They may crack after using them for quite some time, but then it’s easy and cheap to replace.
I think regular clay house bricks will not work as well. They do not reflect heat as well as firebricks.
No, proper fire bricks are always better. And last longer.
This is such a fantastic video. I used to live in Argentina and love a good wood-fired asado. This is a very cool parrilla you’ve built and now I’m inspired to build my own.
The only difference I think I’ll do is have the parrilla itself be adjustable.
Again, you’ve inspired me :).
Thanks, that is great to hear! Yes, having it adjustable would be nice. Get that welder out and start building!
Hi Brandon,
Was wondering if you figured out on how to create an adjustable parrilla?
Thanks in advanced
Cheers
Well, figuring out is easy, I just haven’t seen the need for it. But I may build one in the future, we’ll see 🙂
Hi Hank,
I now know what my 2021 summer project will be! Great contraption you build and good video to support the construction of parrilla.
Was wondering if you can guide me of the steel you have been using, Swedish name (since I live in SE).
I’ll keep U posted on the progress and U will receive an invite for BBQ inspired by Francis Mallmann in the fall.
Cheers
Hi! I use what is commonly known as ‘black steel’, i.e. regular steel. Nothing fancy. Looking forward to your build!
Can you please help me find your Chimichurri sauce recipe.
mikezemlachenko@att.net
Thanks so much!
Yes of course, here it is: https://hankstruebbq.com/chimichurri-2/
Hey Hank, I really liked the video you have made. I’m in the process of making my own Parrilla grill, I came across your page when looking for ideas on how to build one and it’s given me great inspiration! I’m currently in the process of building the main frame working out the dimensions to accommodate the fire bricks nicely. Can I ask is there a certain type of fire brick you used and how did you go about getting them?
Cheers David.
Hi David, and thanks!
I just went to the large diy/construction stores like Wickes (or similar) that carry them. No particular brand, these are used when refurbishing old fire places, so they’re generally available. I picked those that are 1″ thick, as it suited my needs. I know there are 2″ thick ones too, but that’s overkill for what I’m using them for.
Cheers, Henrik
What is the dimension of the square tubing for the frame? What thickness?
It’s 20×20 millimeters, thickness I can’t remember, I think the tube walls are 1.5 millimeters.
You have motivated me to build a Parilla grill. Can you please recommend a starter welder?
Cool, of course you should build one! I can’t recommend a starter welder though, too many brands and too many countries. I’m located in Sweden. I think the most important thing is to get a MIG welder, those are the easiest to work with.
You also motivated me to build one! Thanks for that. Learning to weld first. Can you please tell me how you installed the bigger wheels and if you are still happy with the set up of the wheels? Looking for a durable solution knowing that my parilla will weigh around 80-90 kilos.
Thanks in advance
Cool! I just welded the axle (bought a kit ready to attach) to the legs, it was easy. And yes, the bigger wheels really helps.
thanks for your reply! can you maybe send me a link of the kit you bought?
greets from Belgium
Hi Lukas!
I’m not sure what kit you’re referring to? I built the parrilla myself with the steel I had lying around.
Cheers, Henrik
Of the wheels
Ah, I see! I can’t remember actually, I did google around for wheels with an axle. I recall ATV (all terrain vehicle) web shops had the best options for this. Sorry for not being able to give you a link, but it wasn’t hard to find, hopefully you’ll find something.
Really nice design and guide.
I am about to buil on myself but am considering to have the sides of purely steel, maybe 3mm or so and only use fire-proof briks for the bottom. Anny thought on that approach? Are the insulation of the sides really required?
Thanks
Thanks! Good points. I think 3 mm steel will work fine. I think using fireproof bricks on the left hand side (in my case) is a good idea, the fire really gets very hot, but I don’t think you need it on the back side or anywhere else except the bottom.
If you want you could try and just tap weld the left hand side in place (3 mm steel) and skip the bricks there. After 4-5 uses it should be obvious whether you still need them or not.
Cheers, Henrik
Hey Henrik,
Just wanted to say thanks for posting this and your video. I used it heavily for the build of my bbq. Made a few different design choices and spent a lot of time cleaning up my ugly welds. But I am very happy.
Some images of the final product below:
https://imageupload.io/ilthHllEiHBF8gg
https://imageupload.io/gK9mco3NqUYhD9a
https://imageupload.io/mhMkpPIaG676igF
Cheers!
Warren
Thanks Warren! Great to see, your build looks awesome!
What high heat paint did you use? In the US I’m seeing rustoleum spray paint for bbq 1200 F but fire in the fireplace is likely much hotter. Slightly worried about poisoning my food. Great parrilla!
I did use the rustoleum high heat paint for general areas, then I found another high heat paint (applied with a brush) for engine blocks. I figured that paint was even better for the seriously hot parts of the grill. Can’t really say if it did make a difference in the end, just decided to play it safe 🙂
Hank,
Great build! Looking to build this out this summer. I’m not sure if anyone asked this or not but do you have the dimensions for the cut steel? Like all the legs and steel pieces that make up the frame? I’m having a hard time understanding the true dimensions in order to get the fire brick to properly fit. Also what’s the distance from the top of the square tube to the cross bar? Thanks in advance.
Thanks Christopher!
I don’t unfortunately, and now that I’ve sold it to another pit master I can’t go out and measure it. You’re gonna have to wing it a bit. What I did with the firebricks is I placed them all laid out and measured their size, and then used that as a base. That also gives you the height from the bottom plate to the top edge, as that is the same height (roughly) as the fire bricks themselves, see images. Sorry I can’t be of more help.