
This is part II in the series. You can find part I here, part III here, part IV here and part V here.
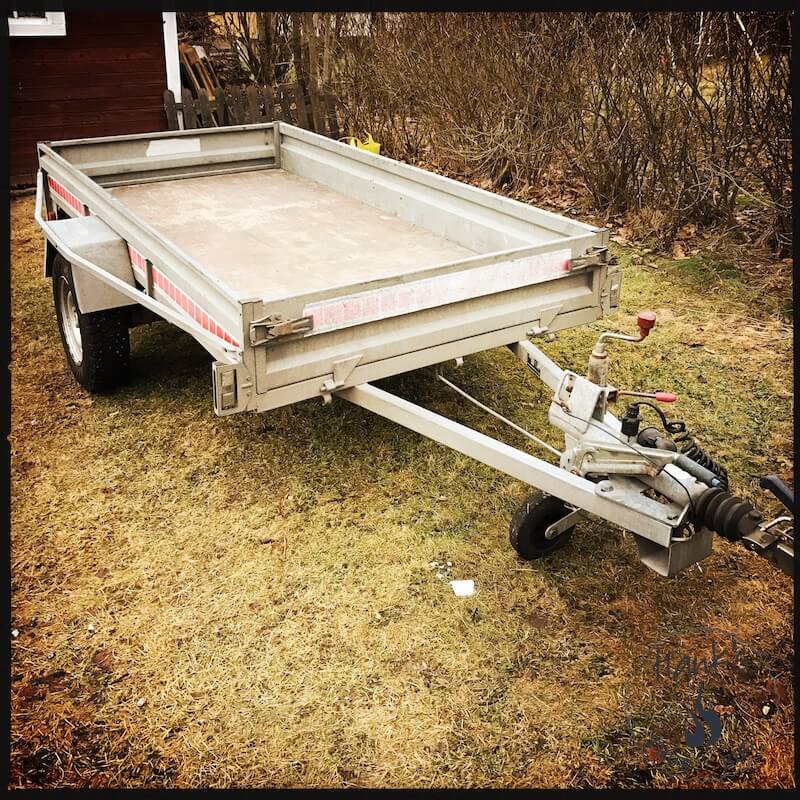
Finding a trailer
I finally ended up buying a used trailer. I quickly realized a proper trailer comes in very handy even for transporting the smoker shorter distances. Said and done, I bought one I can use to mount the smoker on.
The build takes a new turn
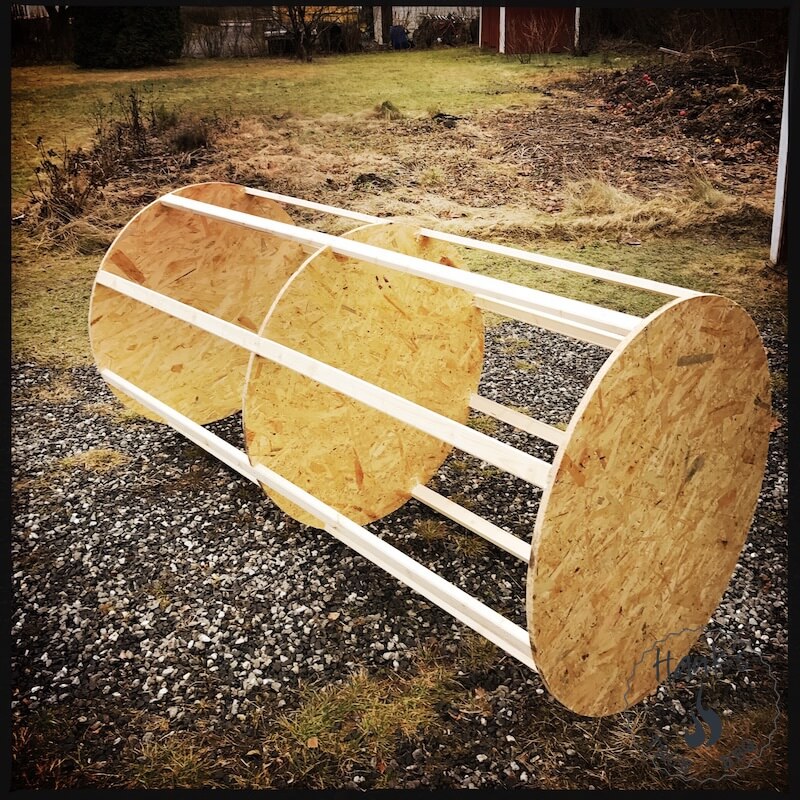
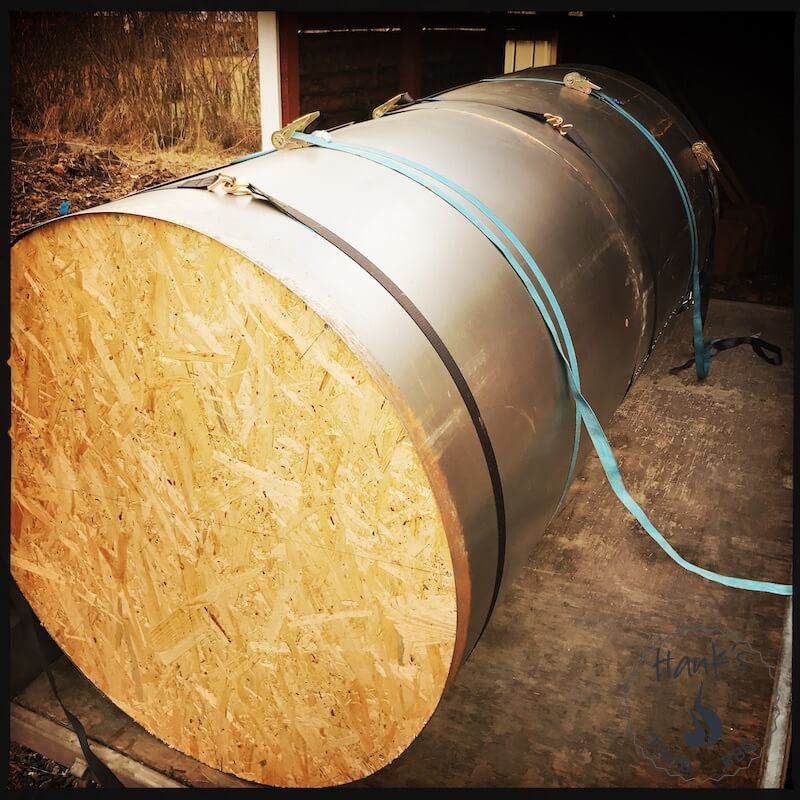
After a lot of thought I couldn’t shake the feeling that the big tank’s weight would be a problem. I need a hydraulic crane to be able to get the tank onto the trailer, and the same for taking it off. So I decided to build my own tank instead, in dual layers of sheet metal. But in order to do that I need a frame or jig to build it around. Said and done, I put one together in a few hours:
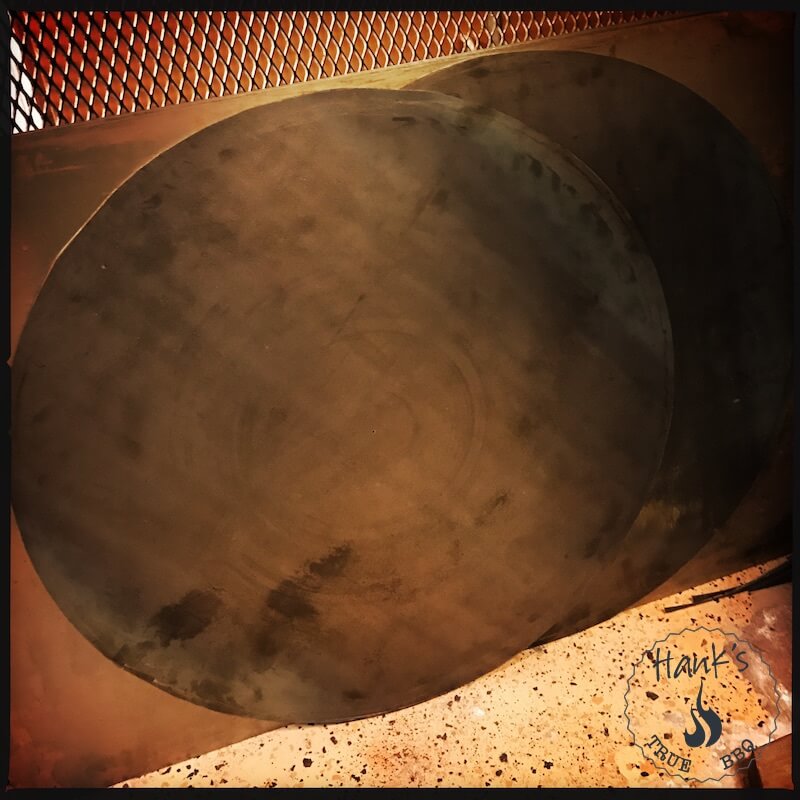
In order to encapsulate the entire wooden frame with sheet metal I visited the local steel monger’s. I made the end pieces in 3 mm steel. It took a good while cutting these out, but they turned out great. The first task was to fabricate a pair of compasses so I could draw a circle that big.
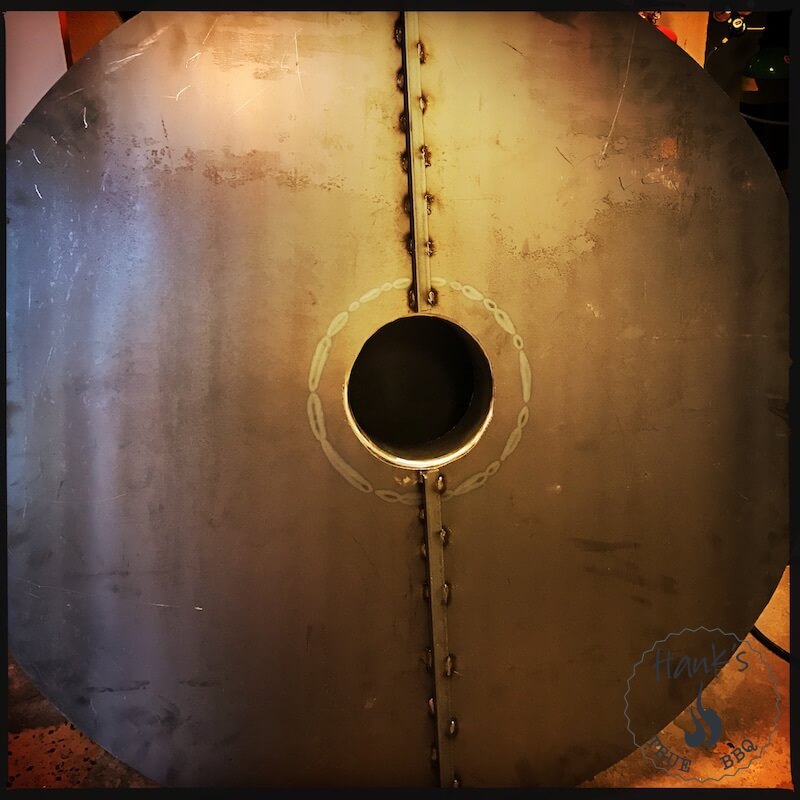
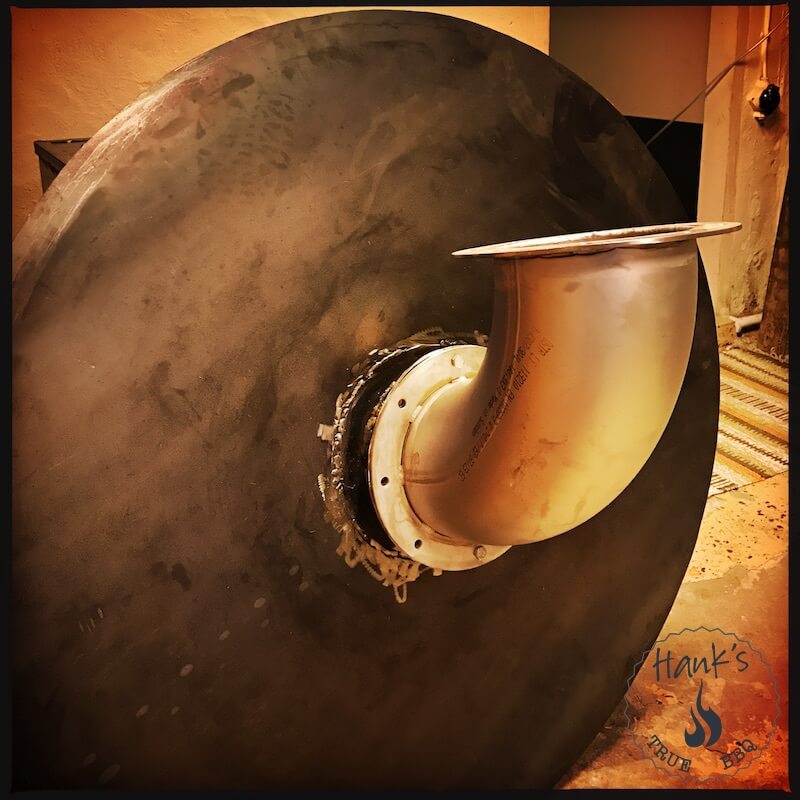
Now it’s time to make a cutout for the chimney on one of the end pieces. Said and done, I fired up the jigsaw and cut a hole. I then welded the chimney attachment in place.
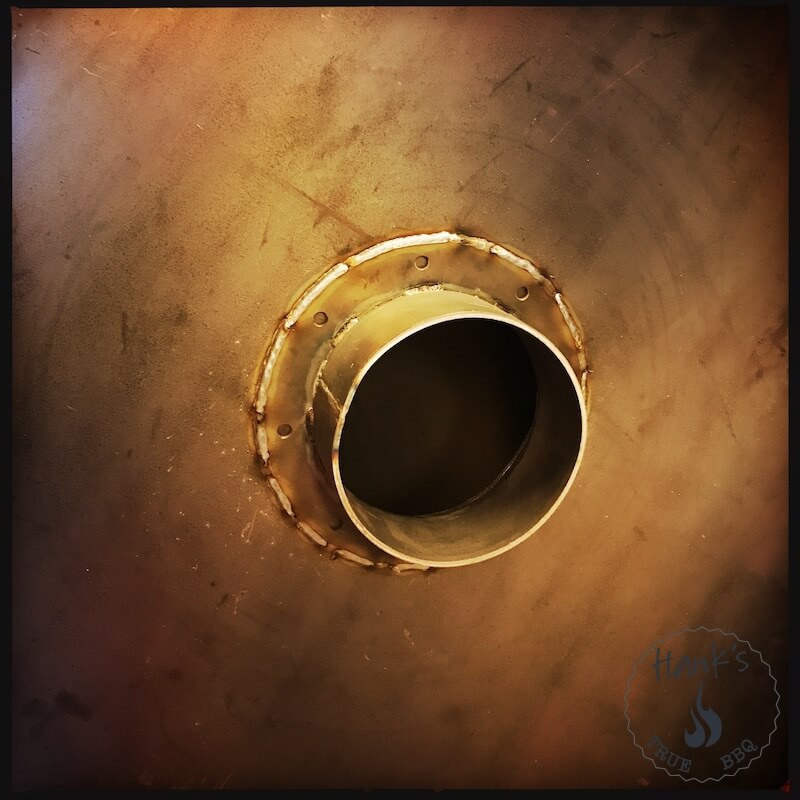
Since the chimney is rather large (long and heavy), I decided to reinforce the end piece from the inside with a piece of angle bar.
Back to the firechamber
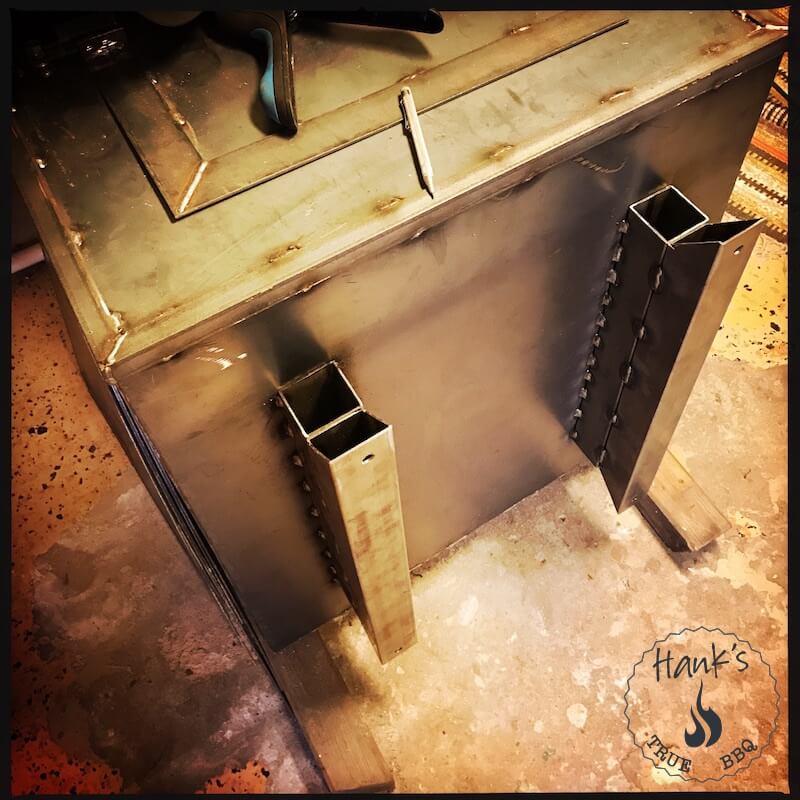
I’ve had plans for a while to put feet on the firechamber, but haven’t gotten around to it. I did have some time today, so now it’s done. A very simple construction:
The New Design
So, it is finally time to begin constructing the food chamber. It is made of thin sheet metal, in two layers, with air in between. An insulated chamber in other words. Here I’ve started “dressing” the wooden frame with sheet metal. I can’t help but think of an airplane when you see that thin metal tube 🙂
The first blooper
Well, it was bound to happen. Every now and then my brain takes a short vacation, without telling me 🙂
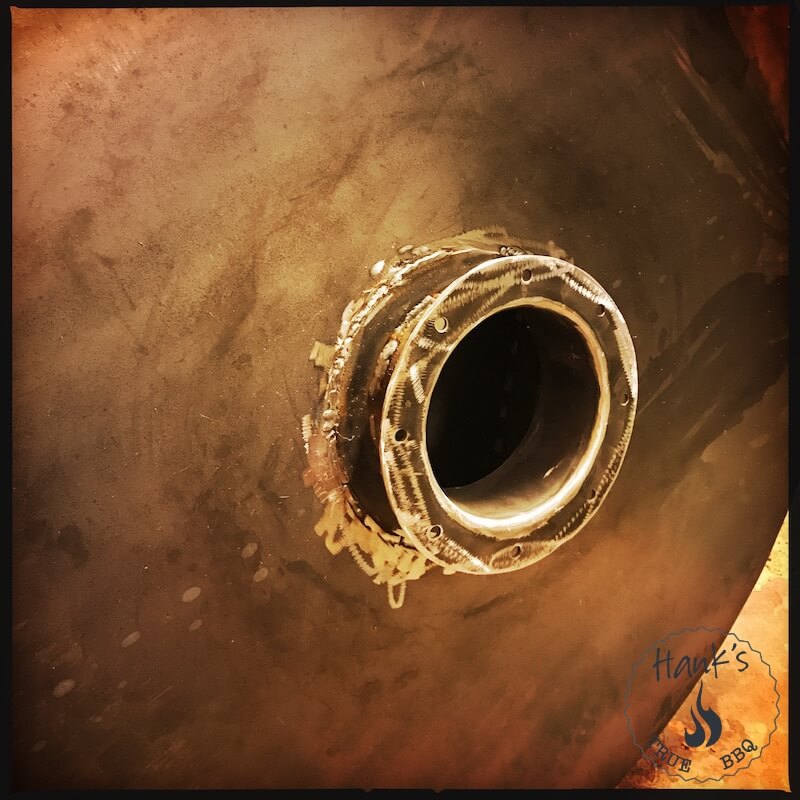
I mounted the smoke stack flange backwards. Very frustrating. However, all I could do is bite the bullet, fire up the steel grinder and cut it off, then re-weld it into place with the flange facing outwards. The way it was meant to be.
Here you can see the 90 degree bend in place.
Read more in part III here.