
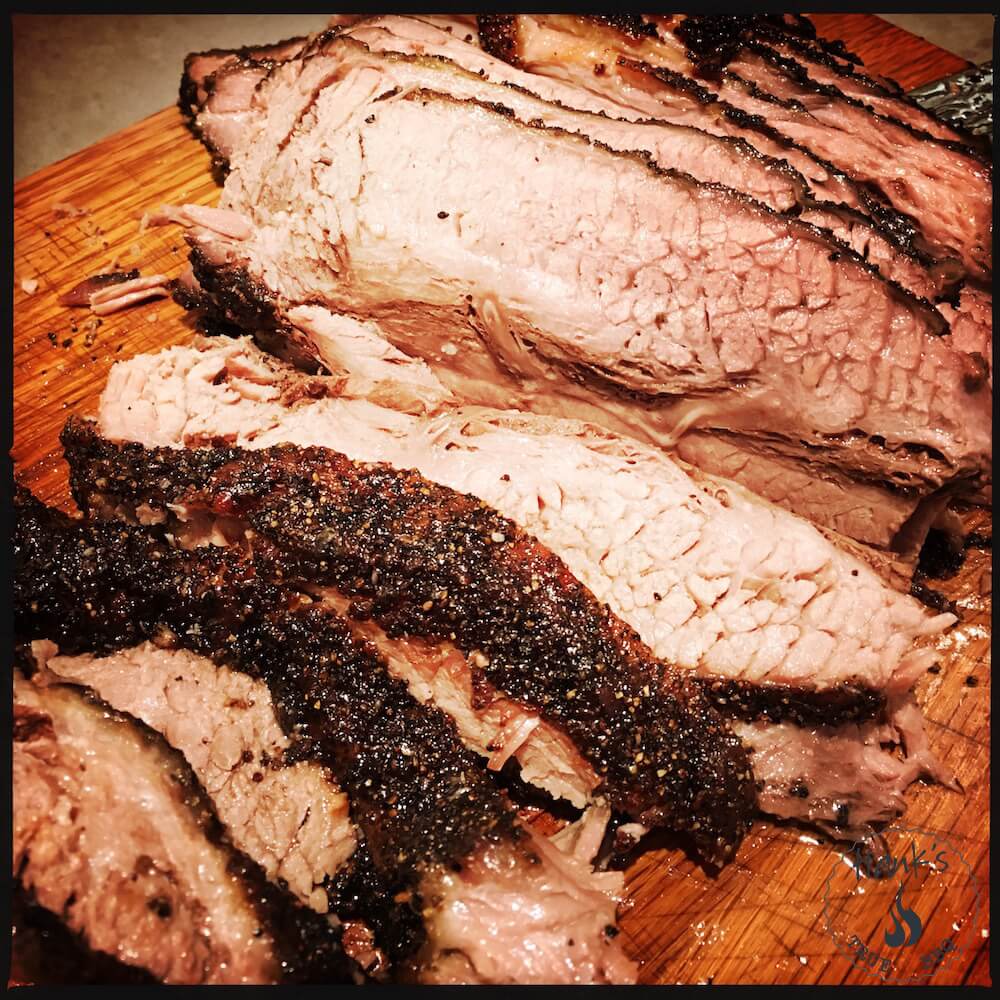
Brisket is a challenging cut of meat that takes a bit of knowledge to master. Cooked right it has a good, clean beef flavor that is well worth the wait it takes to cook it. The challenge lies in the fact that it consists of two muscles, where the flat part is lean and the point part is more marbled. To add to that the muscle fibers in the flat and the point run at different angles which means you have to pay attention when slicing it later.
Cooking a brisket takes a long time, it is usually a full day endeavor. Depending on size of the brisket, as well as cooking temperature, it takes anywhere between 6-12 hours.
To cook a brisket properly the following steps need to be taken, of which two are optional:
Anatomy
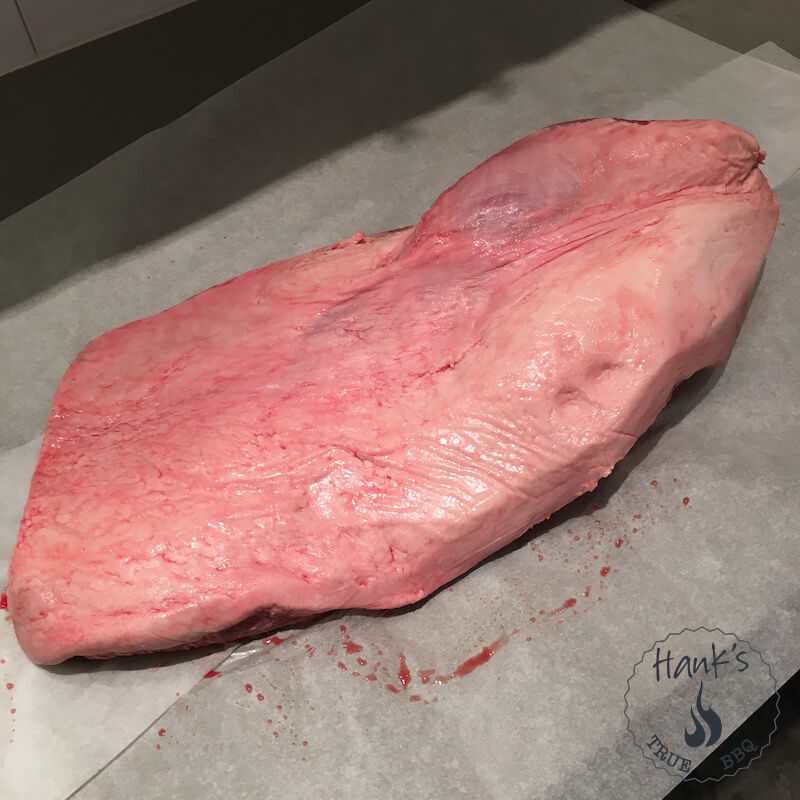
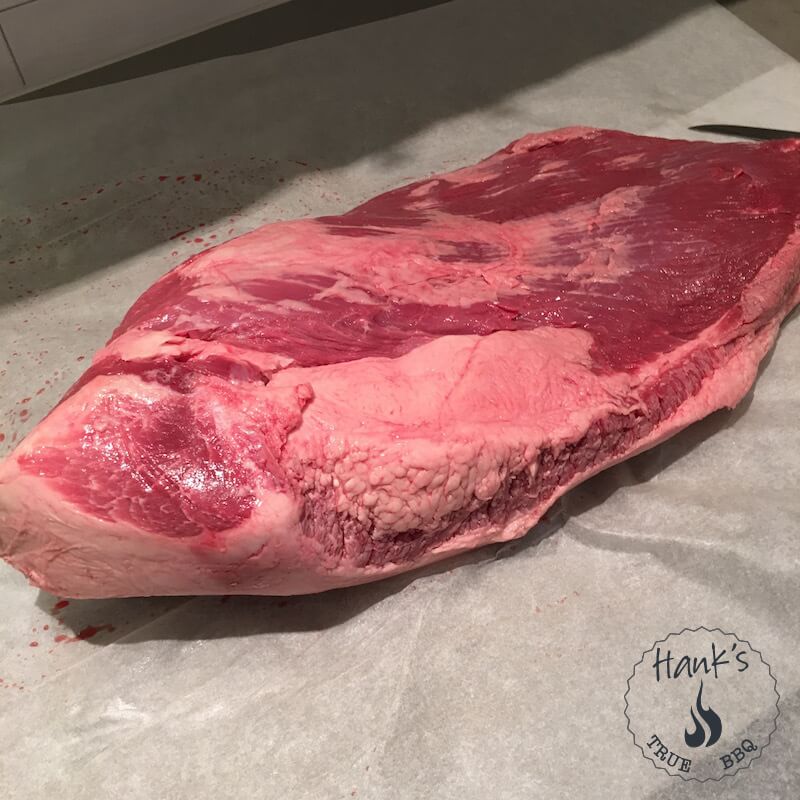
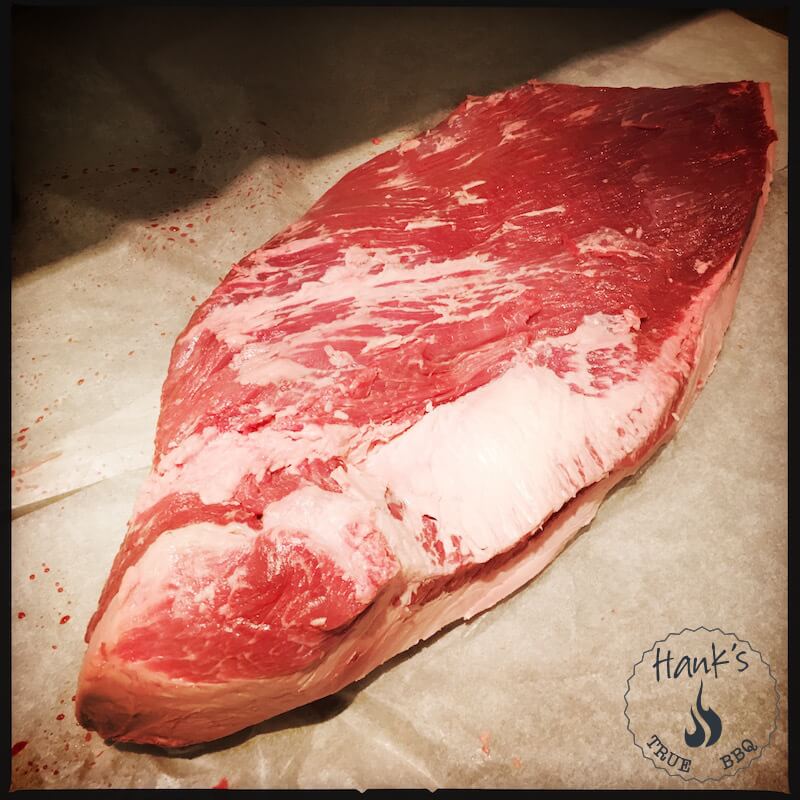
First we need a short anatomy lesson. The brisket is made of two muscles, named the ‘flat’ and the ‘point’. The brisket is the cow’s chest muscle, all the way up to where it attaches to the shoulder. By looking at the pictures it should be obvious which is which. The flat end attaches to the ribs and sternum, and is leaner. The (thicker) point attaches to the shoulder and it is the fattier part. They are held together with a lot of connective tissue and fat. Sometimes when people trim brisket they trim off so much fat that the two muscles separate.
Burnt Ends
This is what most pit masters consider ‘the good stuff’. Burnt ends are always made from the point, since it is fattier. When the brisket is almost done you separate (cut off) the point and let it cook another hour. It is then chopped up into cubes and basted with some bbq sauce, and eaten as is. Seriously good stuff. The point lends itself very well to burnt ends as it is fattier and can take a longer cook as well as more smoke.
Trimming
We trim the brisket in different ways, and for different reasons. We remove fat that won’t render, we trim the thickness of fat to be roughly 1/4 inch thick for flavor and also protection et.c. It is also important to trim it to avoid very thin parts or parts of meat ‘sticking out’. This is done to make it more even to cook, and to avoid parts of the brisket getting burnt.
Start by cutting off 1/2 inch of the thick edge running lengthwise on the brisket (see picture above, the bottom edge in the picture). This area has been treated with hot water when opening the cow carcass, so we want that surface gone, plus some fat. Continue and trim the top surface of the brisket so there is an even 1/4 inch layer of fat. Don’t remove all fat, as it has great flavor. Flip the brisket upside down and trim the bottom.
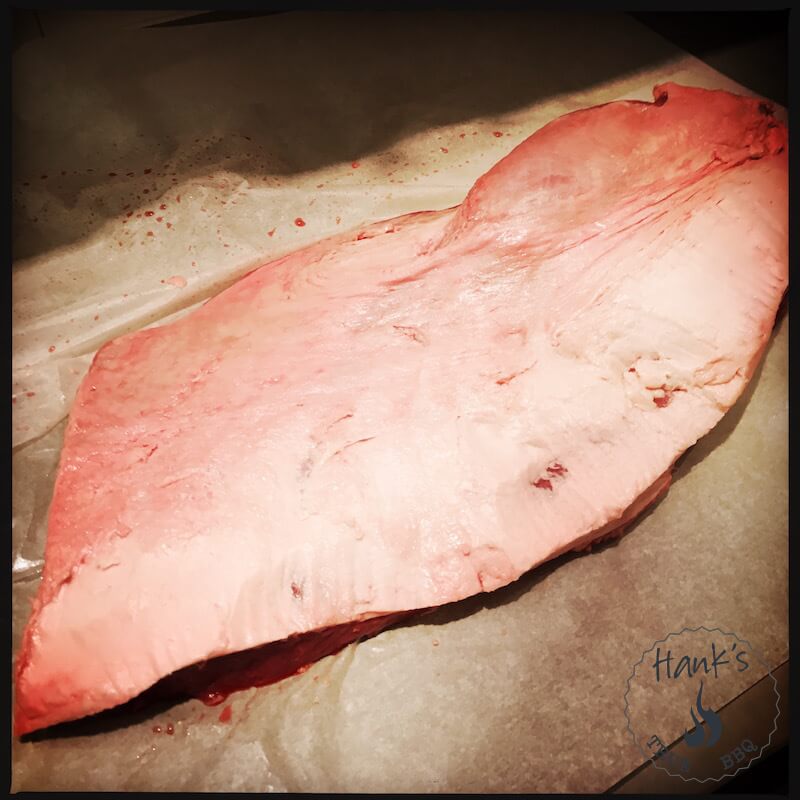
Now squeeze/massage the point to see how much ‘overhang’ there is. Each brisket is different. If there is too much overhang, trim it off with the knife. Too thin parts will get burnt during cooking otherwise. Now look at the thick hard lump of fat located right between the point and the flat. Use a carving knife and cut a concave shape out of it, removing fat until it thins out (see picture below).
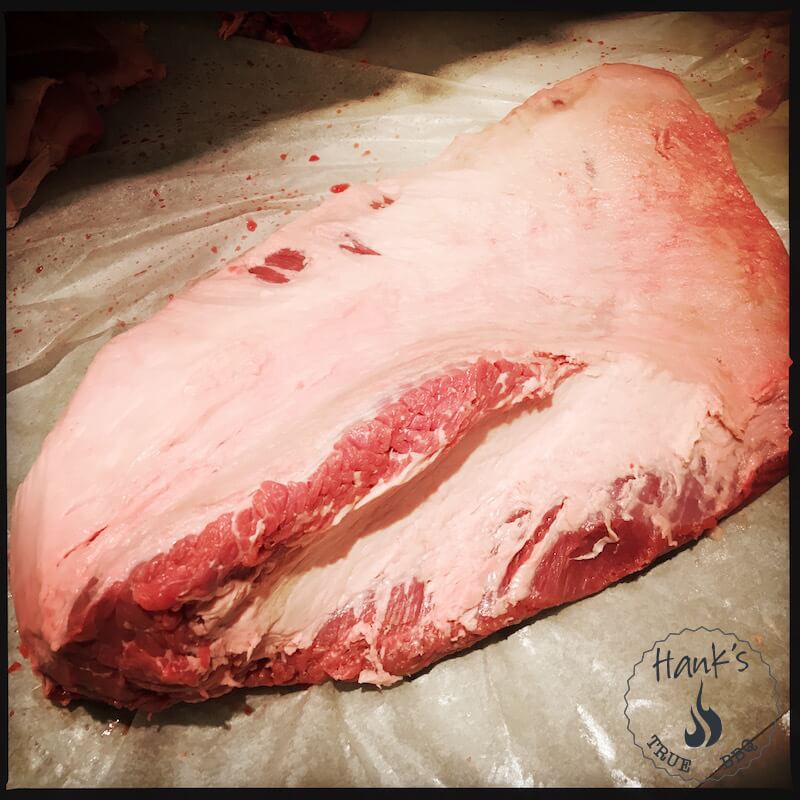
This is determined by poking it with your finger. If it starts to give, then you know it has thinned out enough. Finally cut of the flat short end of the brisket if it is too thin, i.e less than an inch. Otherwise it will be overcooked or dry before the rest of the brisket is done. Also trim any sharp corners/edges, so nothing sticks out. Think aerodynamics.
Injecting (optional)
It is common to inject meat with some kind of liquid on the competition scene. The fluid is often plain beef stock. It is done to pre-compensate for the loss of moisture during the cook, as well as get more flavors deep into the meat. The idea of using plain beef stock is to amplify the meat’s own flavors, and not introduce odd new flavors. A brisket turns out very good without injecting, so skip this step if you’re the least unsure. I rarely do it myself.
Applying a rub
Here we use only coarse ground black pepper. It is a very good starting rub. Once you’ve cooked a couple of briskets with good results you can start experimenting by adding more flavors. First I apply a dry brine the night before (or at least 2 hours before cooking). Use 0.5 tsp per lb of meat. Leave the meat in the fridge until ready. Now take out the brisket and apply the black pepper evenly (important).

Smoking
A brisket is cooked anywhere between 225° F and 275° F. I tend to cook at 240-250° F. You will have to experiment to find the right temp for you and your smoker. If unsure, start with the lower temperature as it is safer. You’re less likely to dry out the meat if cooking at a lower temperature. There’s a big difference in cooking time (we’re talking hours) when you cook at 225° vs 275°, so take that into account when planning your cook.
Spritzing
Depending on type of grill the surface of the brisket could dry out a bit. To compensate for this it is common to use a spray bottle to spritz water or apple cider vinegar every 45 minutes (or more often when needed). I spray with plain water. The flavor won’t matter since it evaporates quickly.
When’s the brisket done?
The general rule is to aim for 203° F. All cows (and therefore meat cuts) are different, so the only sure-fire wayt to know is to probe it. You do it by wiggling the temperature probe. I start wiggling it at 185° F and keep testing every 30 minutes. When it feels ‘soft like buttah’ it’s done. Sometimes that happens at 194° F, and sometimes 203° F. Regardless you never take it past 203° F, but start checking early. The meat will tell you when it’s done.
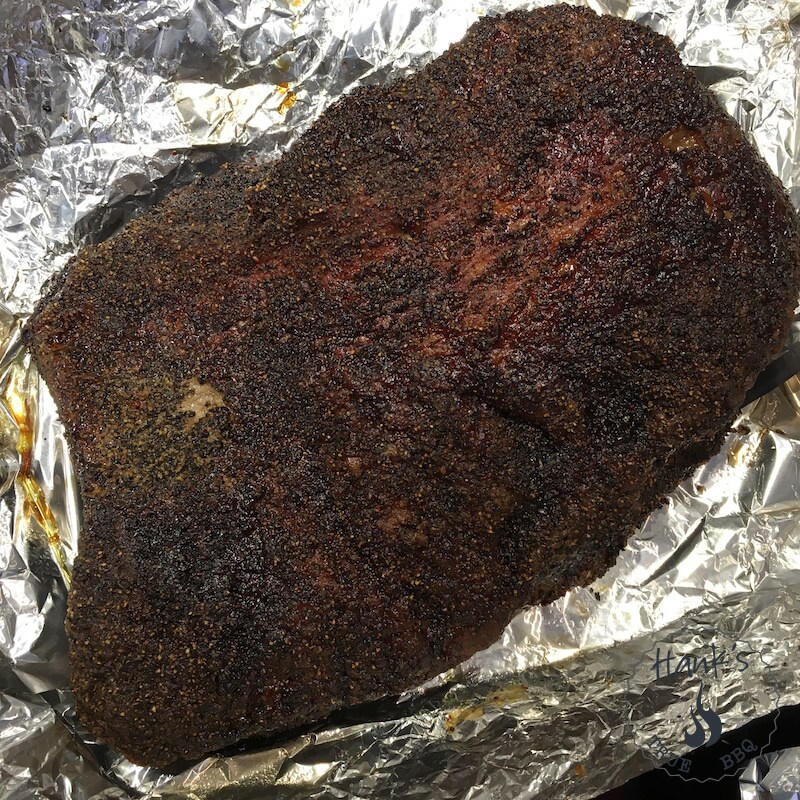
Wrapping (optional)
The reason to wrap the brisket in aluminum foil or butcher’s paper is to retain moisture during the last hours of the cook. If you use aluminum foil it will braise the meat, as no liquid or moisture can escape. If you use butcher’s paper it will release some moisture, which is the point of choosing paper instead. This will still retain moisture, but not braise the meat. You know when to wrap by looking at the color of the bark as well as feeling the brisket. When it is soft (flexes a certain way) you know the fat has rendered properly. You can also wrap the brisket in aluminum foil early (at around 140°-145° F) to force your way past the stall. It is then called a Texas Crutch. We won’t use that technique here though. To summarize: pick up the brisket with both your hands by grabbing it on each side. Try to determine its softness/tenderness by feel and by how much it flexes. Also look at the bark to make sure it has a deep mahogany/brown color. This should be at the end of the stall, when the temperature starts going up again.
Resting
Just because the brisket is smoked doesn’t mean it’s done. A brisket needs resting just like other cuts of meat. Use a faux cambro for that. I typically wrap it in aluminum foil and a thick towel and let it rest for at least two hours. You want to let the temperature come down to roughly 160° F before slicing. Keep close track of the temperature after removing it from the smoker. If it quickly increases more than 10°-15° F (carryover heat), leave the meat bare for 5-10 minutes to slowdown the carryover cooking before wrapping it in aluminum foil and a towel.
Slicing
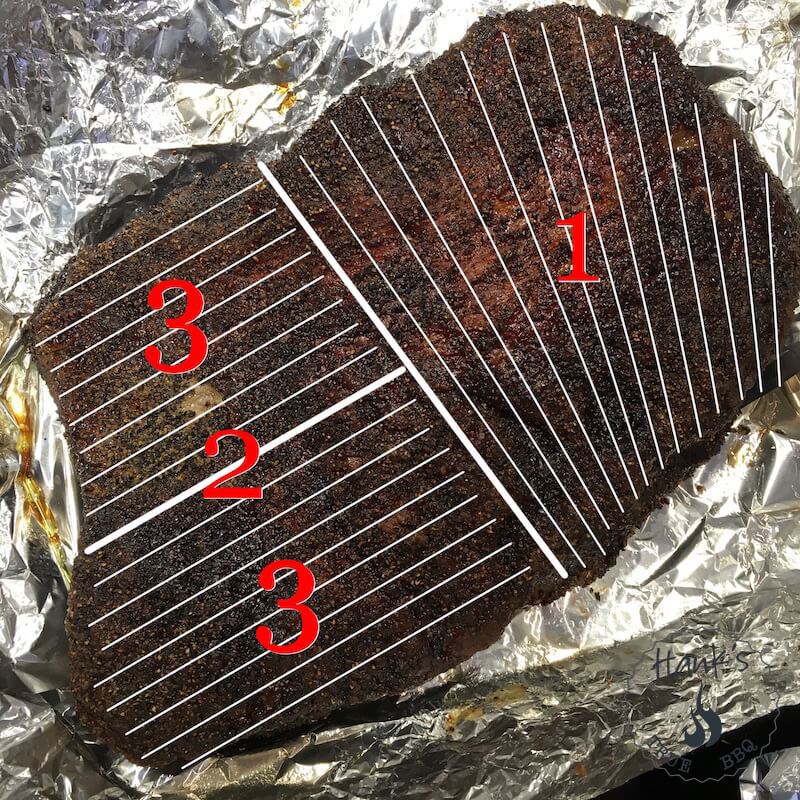
Since the brisket is comprised of two muscles angled differently you need to cut it accordingly. 1: Start by slicing the flat, always against the grain. Start at the flat end, at a 90 degree angle to the muscle fibers. When you have sliced approximately half the brisket, stop. This is where the point begins. 2: Now turn the brisket 90 degrees, and slice the point in two (lengthwise along the brisket). 3: Then start slicing the two halves.
Wow!
What a GREAT description of a smoked brisket and the steps to do the best and get the best!
Thank you!
Tomorrow will be my first attempt to smoke a brisket and I’m excited to see how it comes out especially after your great outline.
Thanks, glad I could help! Let me know if you have any further questions. The main thing to keep in mind is to keep a steady temp in the grill, and just wait it out. No sudden changes.
Thanks for these tips. We are going on vacation and my brother is bringing his pellet smoker and I will be trying your way. I will let you know how it turns out.
Pingback: Where to Put Temp Probe in Brisket? Step-by-Step Advice